Rhino Drawings
Key Project
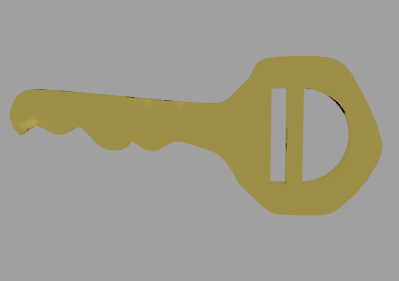
This is the first project that I have made this year (my first year of Rhino). It was a very simple project. All that I had to do was get a picture off of the internet that I could use as a background bit-map. Then, I was able to trace the key. Then I used planar curves to make it a solid and I extruded the surface to make it realistic.
Then, to finish it off, I made other objects to use with boolean difference to make the holes in the key.
Light Bulb
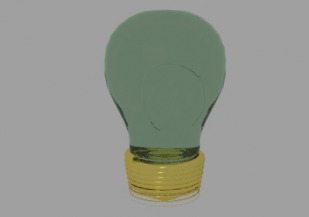
This is the second project that I have worked on this year. It is the lightbulb. Once again, I used background bit-map to trace half of the bulb. Then I revolved the curve which gave me the bulb-like shape. Then, for the screw, I just had to make a helix and pipe it so it gets smaller as it gets down to the bottom.
Flashlight
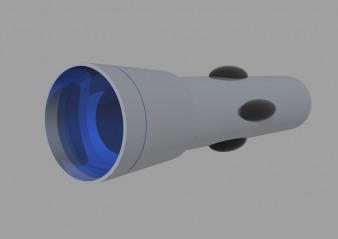
For this flashlight project, I followed a turotial that gave me step by step instructions. It was made up of a bunch of basic shapes that were put together. It is made up of a cylinder, a truncated cone, and a few ellipsoids.
For the head of the flashlight, I made two truncated cones. One was for the part that you see, and the other one was used for boolean difference. I used it to cut out the inside of the head of the flashlight. As for the body, it is just a regular cylinder and I put some ellipsoids on there for decoration.
Pedestal Table
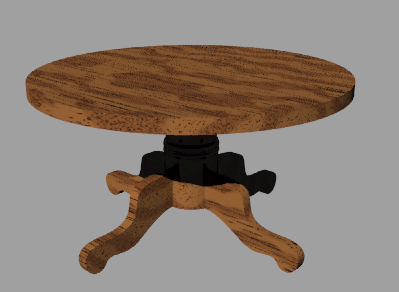
This is the pedestal table that I made. Once again, I used the background bit-map to trace the neck of the table. for the table-top, I just used a thin cylinder and I had to make the legs free hand.
Once I made one of the legs free had, I used the polar array command to copy the leg to each of the four quadrants of the table.
Gallic Knife
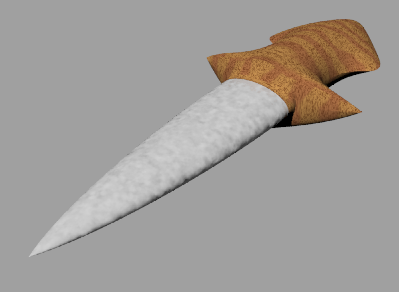
This knife was a very fun project that I made staight from a tutorial that I found online. The whole knife was made from an ellipsoid. All that I did was add a few knots to it and then I was able to use the control points to shape it the way that I did. The only other thing that I had to do was split the knife where I wanted the handle to start and the knife to begin.
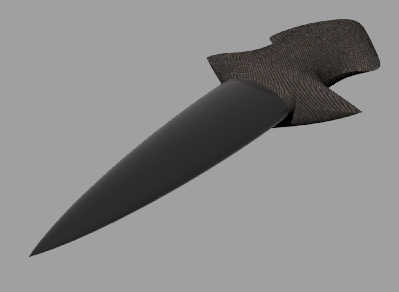
This is another version of my knife, just with a different rendering.
Jack in the Box
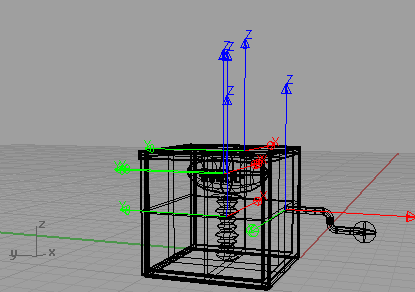
This Jack-in-the-Box project took me quite a long time to complete. I was able to make the box very easily as well as the handle. for the spring, I made a squiggly line and revolved it and for the football, I made an ellipsoid and manipulated the control points to make a football shape.
The thing that probably took the most time though was the Bongo animation. I animated the handle so it turns until the box opens. I used the rotate command to tilt the top backwards. The final thing to animate was the football and spring so they would come out of the box as it opens.
Combination Lock
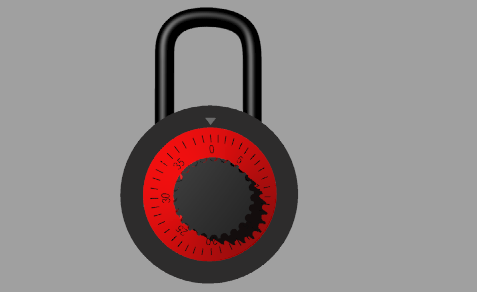
For this project, I also followed a tutorial. Once again, it is made up of a lot of basic shapes - mostly cylinders. For the knob, I just had to make the cylinder and make another skinny cylinder that went on the surface. Then, I used polar array to copy that cylinder 24 times over onto the knob. Then, all that was left to do was to use boolean difference to make the ridges.
Next was to put the numbers on the face of the dial. For this, I used the UV curves and text commands. By using these along with the patch command, I was able to put the numbers onto the dial and render each of them. For the pipe that comes out of the top of the lock, I just drew a line with "control point curves" and piped it.
The only other thing that this project consisted of is the Bongo animation. This was a very simple, yet time consuming task. First was the animation of the dial. I used the rotate command to rotate the lock to certain points on the dial as if someone was turning it to complete a combination. The last thing to animate was the pipe so it would come out of the lock and turn.
Name Project
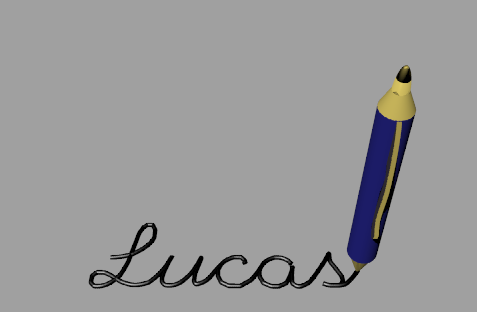
For this project, the challenge was to make a writing utensil that I could animate so it writes my name. To complete this challenge, I used the text command so I could use it almost as a background bit-map to write my name. So what I did was I used control point curves to write my name, and I piped the curve so it could be rendered. As for the pen, I made it with all simple cylinders and cones that I simply joined together.
I then had to animate the pen to move along the path of the name and I needed to animate the name so it slowly appears as the pen went over it. To make the pen go along the path of the name, all that I had to do was go to Object Constraints Manager and animate it to the path of the name. To make the name appear, I had to cut the name into a bunch of pieces using the Split command and then hide them. Then, I was able to make each little segment of the name appear as the pen went over them using the "show" command.
Bomb
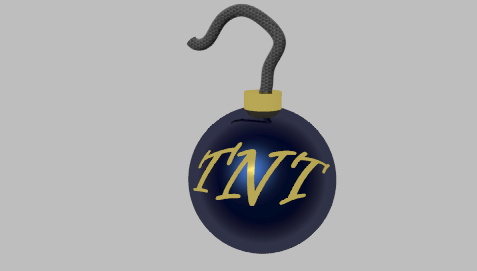
This was, once again,a very easy project as it only took me about a two days to complete. I just made a sphere with a cylinder on top of it for the body and for the fuse, I made a control point curve and piped it. All that I had to do from there was to use the UV curves and text commands to put the "TNT" onto the bomb.
The only thing that was left to do then was animate the bomb so the fuse slowly goes away and eventually explodes. This process was very similar to the name project because I had to cut the fuse into many pieces so I could make a piece disappear in each keyframe.
Basketball and Hoop
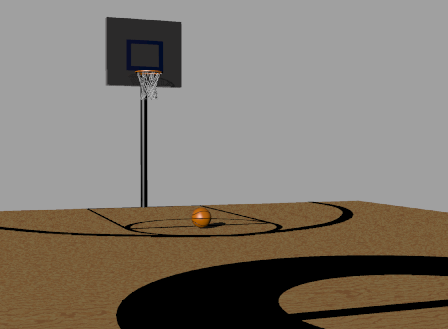
This project was a project that I did on my own. Mr. Croke calls it a "Student Directive Project". In this project, we were able to choose any project that we wanted to do as long as it was rendered and animated. What I chose to do for my project was a basketball and hoop.
Make sure that you check out the animation in the "Movie Files" tab of this website.
Basketball
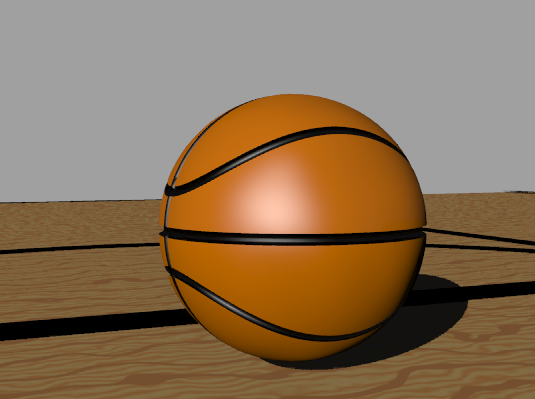
To make the basketball, I made a sphere and made toruses (which is a way to put a line around the sphere) and I piped them. Then, I was able to use boolean difference to create the two straight seams on the basketball. To make the two curved seams, I had to make a circle near the sphere and use the project command. What this did is that it took the circle and it layed it down onto the sphere. I was then able to pipe and use boolean difference on these too.
The last thing that was left to do was to render the ball. In order to make the render the ball and the seams separately, I exploded the surface. Then, I had a finished basketball and I was able to move on to the hoop.
Hoop
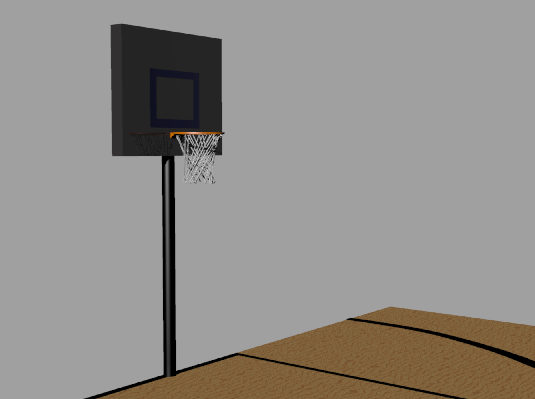
For the hoop, all that I had to do was make some basic shapes. the pole is just a cylinder and the backboard is just a box. For the rim, I made a cylinder and another one that was smaller that I could use for Boolean difference. The last thing that I did was the net; I think this is because it is the hardest part. my solution was to make a bunch of lines that criss-cross and I piped them. It seems to give the illusion that there is a net there, but if you look at it up close, it's just a mess.
Rube Goldberg Project
This goal of this project is to create a machine that completes a simple task. This "machine" is really just a sequence of energy transfers like dominoes for example. For my project, I chose to make my "machine" open curtains. to do this, I made three separate videos that link together to make a humogous Rube Goldberg animation.
Video 1
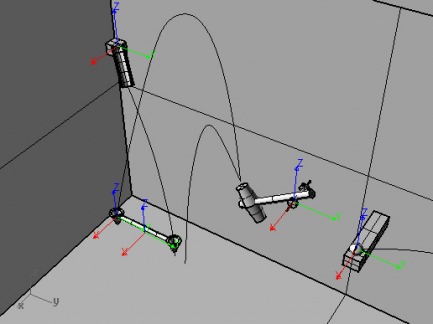
For this project, I made the ball roll down the slide so it falls on the see-saw. This catapults the ball in the other end into the air so it hits the hammer. The hammer then swings and hits the ball off of its platform. This ball then continues into the next video.
All of the pieces of the rendering were made with basic shapes. The slide was made by making two pipes, and I used boolean difference and split. The catapult was just a couple of cones, a cylinder, and some boolean difference; for the hammer, I made a truncated cone and mirrored it and put a cylinder on it for the handle.
Video 2
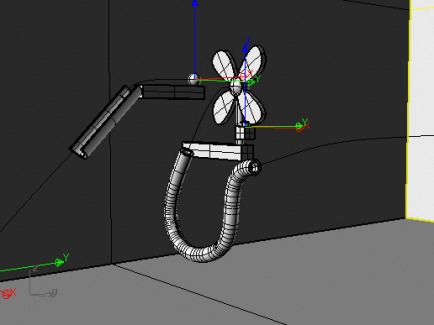
In this video, I made the ball continue so it goes into the tube and comes out on the button. That button turns on the fan which makes the ball roll down the slide, on to another button, and into the next video.
The tube was made by simply making a contol point curve and piping it once for the body, and another time for boolean difference. The fan was made by making a control point curve, patching it, and extruding it. Then, all I needed to do was Bongo everything and I was able to move on to the next video.
Video 3

This is the third and final video of the project. I used the button push that occured at the end of the last video to make marbles drop into the bucket. The bucket then falls and pulls the curtains open, thus completing the simple task.
The marbles are just spheres that I rendered to be chrome colored. For the window, I made the frame with simple boxes and used decal to make it appear as though there was something outside of the window. The pulleys are made up of a bunch of simple cylinders, and the rope was a control point curve that I piped and rendered.
Future Transportation
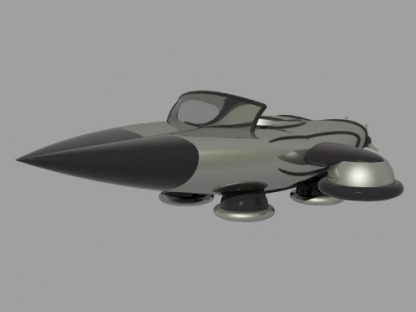
This was a very fun project - mostly because most of the creativity was left up to me. Once again, the whole vehicle was made using very basic commands. The body of the vehicle is just an elipsoid that I warped using the control points. The "gravitation pods" are made of a sphere that I cut in half, and a piped circle.
The windshield is just a rectangle that I also warped with the control points and patched. In order to geth the designs onto the body of the vehicle, I just made circles next to it and then used the project command. Then, I was able to pipe them to give my futuristic transportation project some more detail.
